


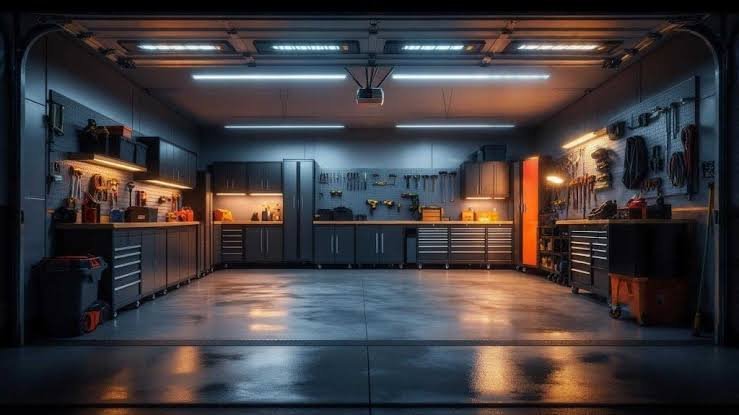
Picture this: you’re in your garage on a Saturday afternoon, trying to find the right socket size from your toolbox, but the single bare bulb overhead casts more shadows than light. You squint, fumble, and eventually grab your phone’s flashlight just to see what you’re doing. Sound familiar? Poor garage lighting is one of those overlooked problems that quietly drains the enjoyment out of every project you tackle. It slows you down, increases the risk of mistakes or injuries, and turns what should be a productive workspace into a frustrating experience.
The good news is that modern shop lighting solutions have come a long way. Today’s LED fixtures deliver brilliant, even illumination that can turn a dim, uninviting garage into a professional-grade workshop. Whether you’re restoring a classic car, building furniture, or simply organizing storage, the right lighting setup makes every task easier and safer. This guide will walk you through everything you need to know—from understanding why proper lighting matters to selecting the best fixtures, customizing your setup with smart and RGB features, and installing everything yourself with confidence.
Why Proper Shop Lighting is Essential for Your Garage
Lighting isn’t just about seeing what’s in front of you—it fundamentally shapes how you interact with your garage space. A well-lit garage functions as a true extension of your home, capable of supporting everything from intricate electronics repair to heavy automotive work. When you upgrade from that single flickering fluorescent tube to a thoughtfully designed lighting system, the transformation is immediate and dramatic. Tasks that once felt tedious become manageable, and you’ll find yourself spending more time in the space simply because it feels good to be there.
The Impact on Safety and Productivity
Inadequate lighting is directly linked to workplace accidents, even in home garages. Shadows obscure tripping hazards like extension cords, tools left on the floor, or uneven surfaces. When you’re operating a table saw or drill press, being unable to clearly see your cut line isn’t just inconvenient—it’s dangerous. Proper illumination, typically recommended at 50 lumens per square foot for general garage use and up to 300 lumens per square foot for detailed workbench tasks, eliminates these risks. Beyond safety, bright and evenly distributed light reduces eye strain and mental fatigue. You’ll work faster because you’re not constantly repositioning yourself to catch better angles, and your finished results will show greater precision because you can actually see fine details as you work.
Enhancing Aesthetics and Value
A well-lit garage immediately looks cleaner and more organized, even before you touch a single storage bin. Bright, uniform lighting reveals the full space, making it appear larger and more intentional. For homeowners considering resale, an upgraded garage with modern lighting signals that the property has been well-maintained and thoughtfully improved. Real estate professionals consistently note that finished garages with quality lighting appeal strongly to buyers who envision the space as a workshop, gym, or hobby area rather than just a place to park cars.
Understanding Different Types of Garage Lighting Solutions
Not all garage lights are created equal, and the sheer variety of options available today can feel overwhelming. The key is understanding what each type offers so you can match your lighting to your specific needs. Gone are the days when your only choices were a bare incandescent bulb or a buzzing fluorescent tube that took five minutes to warm up on cold mornings. Modern lighting technology gives you precise control over brightness, color, energy consumption, and even the visual atmosphere of your workspace.
LED Shop Lights: The Modern Standard
LED shop lights have become the go-to choice for garage workshops, and for good reason. They consume roughly 75 percent less energy than traditional incandescent equivalents while producing significantly more light per watt. A typical 4-foot LED shop light delivers between 4,000 and 5,000 lumens while drawing only 40 watts—comparable output to old fluorescent fixtures that consumed nearly twice the electricity. LEDs also reach full brightness instantly, perform well in cold temperatures (a critical advantage in unheated garages), and last 50,000 hours or more. This means if you use your garage lights four hours daily, a quality LED fixture could last over 30 years without replacement. Their slim, lightweight profiles make them easy to mount in various configurations, whether you prefer surface-mounted fixtures, hanging chains, or plug-and-play designs that require no hardwiring at all.
Hyperlite LED Lights and Their Benefits
Among the many LED options available for garage and workshop applications, Hyperlite fixtures stand out due to their high lumen output and robust construction. These lights are engineered with commercial-grade components, often featuring aluminum housings with integrated heat sinks that maintain performance over years of use. Many models deliver 15,000 lumens or more from a single fixture, meaning fewer units are needed to fully illuminate a two or three-car garage. Their designs typically include wide beam angles that spread light uniformly rather than creating harsh bright spots directly beneath each fixture. Additionally, Hyperlite offers options with high Color Rendering Index ratings above 80, ensuring that paint colors, wire insulation, and material finishes appear true to life under their illumination.
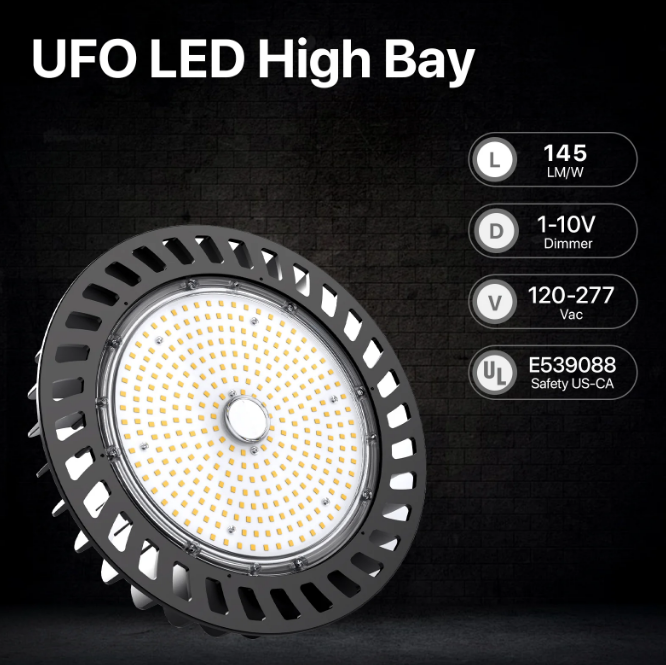
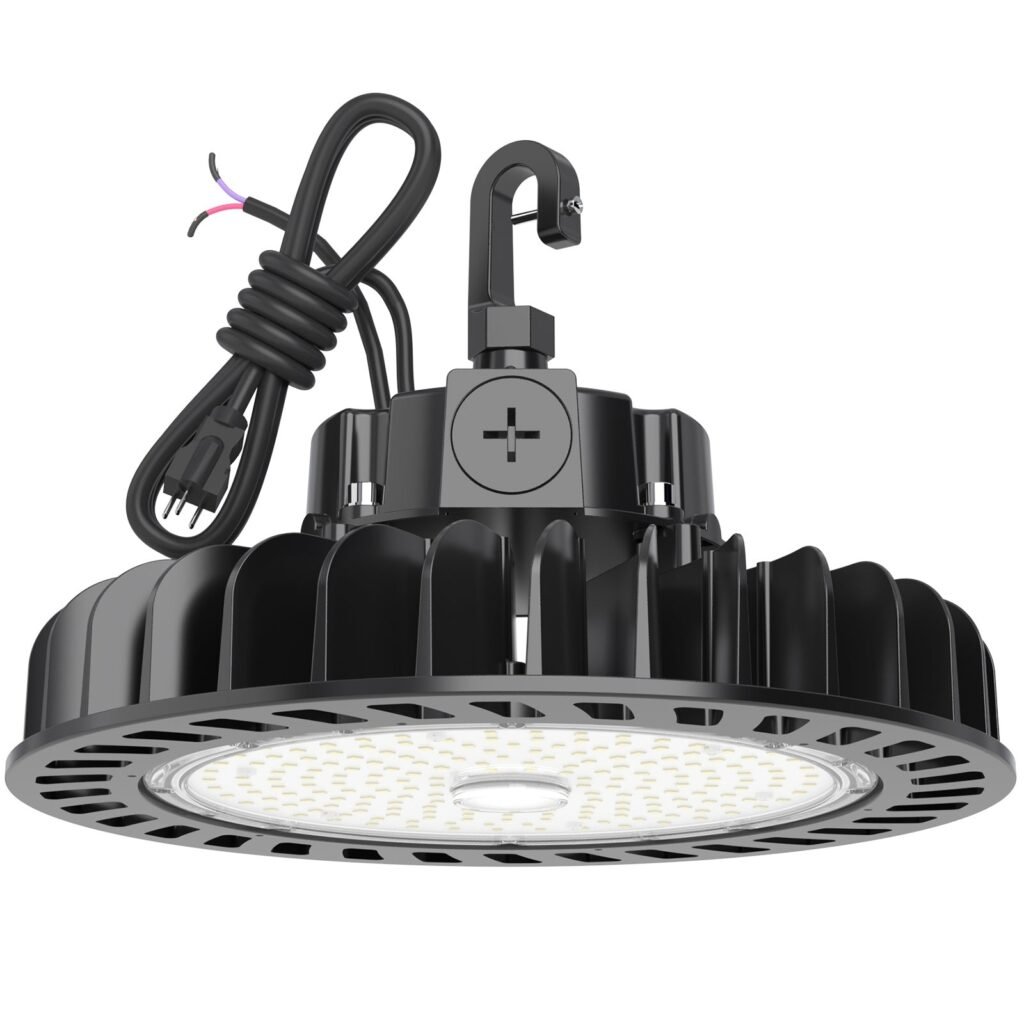
Warehouse Lighting for High Ceilings
If your garage features ceilings above 12 feet—common in barns converted to workshops, RV garages, or industrial-style buildings—standard shop lights mounted at that height won’t deliver adequate foot-candle levels at the working surface. High bay and warehouse-style lighting fixtures solve this problem with concentrated optical designs that project powerful beams downward over greater distances. These fixtures typically range from 100 to 200 watts and produce 14,000 to 30,000 lumens each, with reflector or lens assemblies that focus the output into 60 to 120-degree beam angles. Mounting them requires sturdy hooks or chains rated for their weight, but the result is ground-level illumination that rivals commercial facilities. For garages with ceiling heights between 8 and 12 feet, low bay alternatives provide a middle ground with moderate output and wider distribution patterns.
How to Select the Right LED Lights for Your Garage
Choosing the right LED lights isn’t as simple as grabbing whatever’s on sale at the hardware store. Your garage has unique characteristics—its dimensions, ceiling height, wall color, and primary use all influence which fixtures will deliver the best results. Taking a systematic approach to selection ensures you invest in lighting that actually solves your visibility problems rather than creating new ones.
Assessing Your Garage’s Layout and Ceiling Height
Start by measuring your garage’s length, width, and ceiling height, then calculate the total square footage. A standard two-car garage runs about 400 to 576 square feet, while three-car garages can exceed 800 square feet. Next, identify distinct zones within the space. Your primary workbench area needs the most intense illumination, while general floor space for parking or storage requires less. Sketch a simple overhead diagram marking these zones, noting where shadows typically form—usually along walls, under shelving units, and beneath raised vehicles on lifts. Ceiling height determines fixture type: standard 8 to 9-foot ceilings work perfectly with flush-mounted or chain-hung shop lights, while anything above 12 feet calls for high bay fixtures with focused optics. Also consider obstructions like garage door tracks, opener mechanisms, and exposed joists that might block light distribution or complicate mounting.
Key Features to Look For: Brightness, Color Temperature, etc.
Lumens matter more than wattage when evaluating LED fixtures. For a functional garage workshop, aim for a total output that achieves 50 to 100 lumens per square foot across the general space, with supplemental task lighting pushing workbench areas to 300 lumens per square foot. Color temperature, measured in Kelvin, dramatically affects how your space feels and how well you see detail. Lights in the 4000K range produce a neutral white that works well for general use, while 5000K delivers a crisp daylight tone preferred by most woodworkers and mechanics for its ability to reveal true colors and fine details. The Color Rendering Index measures how accurately colors appear under artificial light—look for a CRI of 80 or above, with 90-plus being ideal if you do paint matching, staining, or electrical work where wire color identification is critical. Beam angle determines spread: wider angles of 120 degrees or more suit general ambient lighting, while narrower 60 to 90-degree angles concentrate light on specific work surfaces.
Comparing High-Output LED Fixtures with Standard Options
When weighing high-output fixtures like those from Hyperlite against standard consumer-grade shop lights, several distinctions emerge. Commercial-grade fixtures typically deliver substantially higher lumen output per unit, which means you can illuminate the same space with fewer fixtures and simpler wiring runs. Their aluminum construction dissipates heat more effectively than the plastic housings found on budget alternatives, directly translating to longer LED lifespan and sustained brightness over years of use. Where many economy shop lights begin dimming noticeably after 15,000 to 20,000 hours due to thermal degradation, well-engineered fixtures with proper heat management maintain their rated output far longer. For DIY enthusiasts who use their garages frequently, this durability offsets the higher initial investment. Standard linked shop lights still serve well for basic storage garages or spaces where maximum brightness isn’t essential, but for serious workshop environments where you need reliable, powerful illumination across a large area with minimal fixture count, the performance gap becomes meaningful.
Customizing Your Garage Lighting with RGB and Smart Features
Once you’ve nailed down your primary illumination, the real fun begins. Modern garage lighting goes far beyond simple on-and-off functionality—today’s fixtures offer color customization and intelligent controls that let you tailor the environment to whatever you’re doing at any given moment. This isn’t just about aesthetics, though that’s certainly part of the appeal. Adjustable lighting can genuinely improve how you work, relax, and use your garage across different activities throughout the week.
Exploring RGB Garage Lights for Personalization
RGB garage lights give you the ability to shift your space’s entire character with the tap of a button. Working on detail-oriented tasks like soldering or model building? Switch to a cool blue-white that sharpens contrast and reduces eye fatigue. Hosting friends to watch the game on a garage-mounted TV? Dial in your team’s colors for atmosphere. Many gearheads use red lighting during late-night sessions because it preserves night vision while providing enough visibility for casual organization or cooldown tasks after an intense build session. Beyond novelty, RGB systems with tunable white modes let you shift between warm 3000K tones for comfortable evening hangouts and crisp 5000K daylight for precision work—all from the same fixture set. Look for RGB panels or strip systems rated for garage environments, meaning they’re dust-resistant and capable of handling temperature swings without color drift or premature failure.
Integrating Smart Lighting Controls
Smart controls eliminate the frustration of fumbling for switches with greasy hands or navigating a dark garage to find the light panel. Voice assistant integration through platforms like Alexa or Google Home lets you call out commands—turning lights on, adjusting brightness, or activating specific zone presets—without putting down your tools. Motion sensors automatically illuminate the space when you walk in and shut everything off after a set period of inactivity, saving energy on days you forget to flip the switch. App-based scheduling proves particularly useful if you want lights on before you arrive home from work, and dimming controls let you reduce output during simple storage retrieval without blasting full workshop brightness. Many smart systems also support grouping, so you can independently control workbench lighting, overhead ambient fixtures, and accent RGB strips as separate zones from a single interface.
Step-by-Step Guide to Installing Your Shop Lights
With your fixtures selected and your goals clear, it’s time to get those lights up and running. Installation doesn’t require professional electrician skills for most plug-and-play LED shop lights, though hardwired setups demand basic electrical knowledge and strict safety practices. A methodical approach ensures your finished installation delivers the even, shadow-free coverage you planned for.
Planning Your Lighting Layout
Return to the overhead sketch you created during your assessment phase and mark exact fixture positions. Space fixtures evenly across the ceiling, typically 4 to 5 feet apart for standard 8-foot ceilings, ensuring overlap between each light’s beam spread to eliminate dark gaps. Position your brightest fixtures directly above workbenches and machinery, oriented so they illuminate the work surface without placing your body’s shadow over the task. For high bay installations, center fixtures over primary activity zones since their focused beams cover less lateral area. Avoid placing any fixture directly above the garage door track path, and account for the door opener unit by offsetting nearby lights to either side. Mark mounting points on the ceiling with painter’s tape so you can visualize the pattern before drilling a single hole.
Installation Tips for DIY Enthusiasts
Always begin by switching off the circuit breaker feeding your garage—never rely solely on the wall switch. For plug-in shop lights, installation is straightforward: secure the mounting clips or chains to ceiling joists using lag screws rated for the fixture weight, hang the lights, and plug into a nearby outlet or power strip with surge protection. Hardwired fixtures require connecting supply wires to the fixture leads—match black to black, white to white, and green or bare copper to the ground terminal, securing each connection with wire nuts and wrapping with electrical tape. After mounting all fixtures, restore power and test each one individually, checking for flickering that might indicate a loose connection. Walk the entire garage floor and observe whether any dark spots remain, then adjust fixture angles or add supplemental lighting where needed. If you’ve installed smart controls or RGB systems, complete the app pairing process while you have easy access to each fixture.
Build Your Ideal Garage Workshop This Weekend
Transforming your garage from a dim, shadow-filled space into a brilliantly lit workshop doesn’t require a massive budget or professional help—it requires the right knowledge and a willingness to invest in quality solutions. As we’ve explored, proper shop lighting directly impacts your safety by eliminating hidden hazards, boosts your productivity by reducing eye strain and repositioning, and elevates the overall feel of your garage into a space you genuinely want to spend time in.
The path forward is clear: assess your garage’s unique dimensions and needs, select LED fixtures that deliver reliable high-output performance, and consider warehouse-style options if you’re working with elevated ceilings. Don’t overlook the power of RGB garage lights and smart controls to personalize your environment for different tasks and moods throughout the week. With a thoughtful layout plan and basic installation skills, you can complete this upgrade in a single weekend. The long-term payoff—years of brilliant, energy-efficient illumination that makes every project more enjoyable and every result more precise—makes this one of the smartest improvements you can make to your home. Grab your measuring tape, sketch that layout, and start building the workshop you deserve.